What drill bit to use for plasterboard?
What Type of Drill Bit Should Be Used for Diamond-Coated Panels?
When selecting a drill bit for diamond-coated panels, several factors must be considered, including the type of drill bit, size specifications, and specific application requirements. Below is a detailed analysis of key considerations:
1. Choosing the Right Drill Bit Type
- High-Speed Steel (HSS) Drill Bits: Suitable for drilling materials of general hardness, but they may wear out quickly when used on harder diamond-coated panels.
- Carbide Drill Bits: Due to their high hardness and wear resistance, carbide drill bits are more suitable for hard materials like diamond-coated panels. They offer higher efficiency and longer service life.
2. Selecting the Correct Drill Bit Size
The size of the drill bit primarily depends on the required hole diameter. For diamond-coated panels, commonly used drill bit diameters range from 1mm to 10mm, though larger or smaller sizes can be selected based on needs. When choosing a drill bit size, consider the actual machining requirements, panel thickness, and desired hole precision.
3. Usage Considerations
- Speed and Feed Rate: Proper rotational speed and feed rate are crucial to prevent overheating and maintain drilling quality.
- Cooling and Lubrication: Using coolant or lubricant during drilling reduces friction between the drill bit and material, extending the bit’s lifespan.
- Regular Inspection and Replacement: Periodically check the drill bit for wear and replace it when necessary to maintain drilling quality and efficiency.
In summary, selecting the appropriate drill bit type and size is essential for successfully machining diamond-coated panels. We recommend using carbide drill bits tailored to specific needs, ensuring operation at optimal speeds and feed rates while applying coolant or lubricant to minimize wear. By following these guidelines, you can achieve more efficient and precise drilling on diamond-coated panels.
Ultimate Guide to Screwing into Drywall: Avoid These Pitfalls & Master the Job!
Drywall, known for its lightweight, fire-resistant, and easy-to-shape properties, is a popular choice for ceilings and partition walls in home renovations. However, many people struggle with the question: “Can you screw into drywall?” The answer is yes, but only with the right techniques—otherwise, you risk cracks or even collapse. Let’s break it down!
1. Can You Screw into Drywall? 3 Key Factors!
Yes, but follow these rules:
- Screw Type: Avoid standard wood screws—they loosen easily. Self-tapping screws are ideal because their threads grip the drywall’s internal structure tightly, reducing the risk of cracking when used with a drill.
- Stud/Joist Support: If the drywall is backed by metal or wooden studs, screws should be anchored into them for maximum load-bearing capacity.
- Weight Limit: Without stud support, a single self-tapping screw should hold no more than 5 kg (11 lbs). For heavier items (e.g., shelves), use reinforcement anchors.
2. Step-by-Step Guide: How to Screw into Drywall Properly
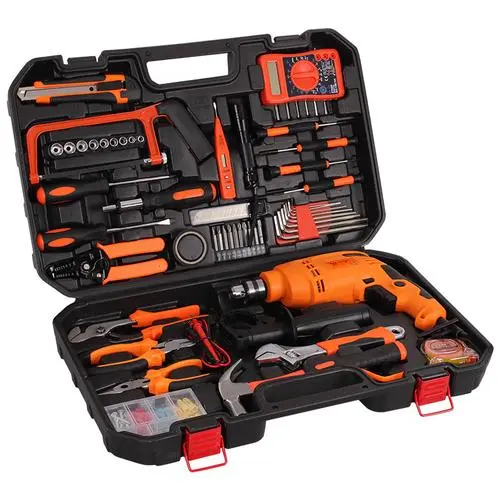
Tools & Materials Needed:
- Drill + 3mm drill bit (pre-drilling prevents cracking)
- Self-tapping screws (recommended: 3.5mm diameter, 25mm length, rust-resistant)
- Level/measuring tape (for precise hole placement)
Instructions (With Pitfall Avoidance Tips):
- Mark the Spot: Use a pencil to mark drilling points, avoiding seams (weakest areas).
- Pre-Drill Holes: Set the drill to low speed and drill vertically, stopping 2–3mm shorter than the screw length.
- Drive the Screw: Slowly screw in until the head sits 0.5mm below the surface. Avoid overtightening!
- Rust Prevention: Cover screw heads with drywall filler to prevent oxidation.
❌ Deadly Mistakes to Avoid:
- Using expansion anchors (drywall lacks the density to hold them, leading to cracks).
- Drilling holes too close together (keep spacing ≥15cm to maintain strength).
3. Advanced Techniques: Hanging Heavy Objects on Drywall
For heavier items (e.g., mirrors, cabinets), try these solutions:
- Pre-install “Butterfly Clips”: Attach metal anchors to studs before drywall installation.
- Hollow-Wall Anchors: Use nylon toggle bolts, which expand behind the drywall for a secure hold (supports up to 20 kg / 44 lbs).
- Reinforce with Extra Studs: During construction, add horizontal studs in a grid pattern for stronger support.
4. Real-Life Horror Stories: What NOT to Do
- Case Study: A homeowner used an impact drill + expansion anchor for a ceiling light—the drywall collapsed in 3 days.
- Why It Failed: Impact drills vibrate excessively, damaging drywall, while expansion anchors require solid backing.
- Fix: Fill misdrilled holes with drywall compound, let dry, and redrill correctly.
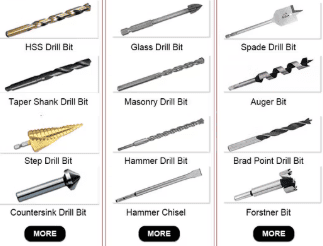
Drywall Drill Bit Selection Guide: Material & Size Matter
1. Best Drill Bit Materials
- Titanium-Coated Bits: Excellent wear resistance, ideal for frequent small-hole drilling.
- Alloy Steel Bits: High toughness, better for holes >6mm.
- Avoid Carbon Steel Bits: They dull quickly on drywall.
2. Matching Drill Bit Size to Hole Diameter
- Standard screws: Use 3–4mm bits.
- Expansion anchors: Require 5–6mm bits.
- Large holes (>8mm): Use step drill bits, increasing diameter in ≤3mm increments per pass.
3. Specialty Drill Bits for Drywall
- Hole Saws: Best for large circular cuts (e.g., electrical boxes).
- Offset/Eccentric Bits: Avoid embedded pipes/wires.
- Auto-Stop Bits: Prevent drilling through the back paper layer.
4. Optimal Drilling Parameters
- Speed: 800–1200 RPM.
- Pressure: Apply steady, even force.
- Dry Drilling: Clear dust from flutes regularly.
- Wet Drilling: Use waterproof bits.
Pro Tip: For more drywall product options, check out Baidu’s “Ai Cai Gou”—it offers a wide range of products for comparison and inspiration!